2014 年になって聴き漁った Tech Podcast

今更ながら Podcast にはまってしまった

Podcast を先月から今月にかけて聴き漁っていた。 芸能人の Podcast なんてものには興味ないので、 聴くのはもっぱら、Tech Podcast

ただ、iTunes Store で探したけど、日本のエンジニアがやってる Podcast ってあまり無かった。 iTunes Store だけ、っていう探し方が悪いのかもしれないけど。 自分が購読している Podcast を紹介してみる。 英語力が残念なため、日本語ばかりなのはご愛嬌。

Rebuild

f:id:griefworker:20140219195646j:plain

Perl の神こと miyagawa 氏の Podcast。 そのときホットなニュースやテクノロジーが話題の中心。 印象に残っているのは Infrastructure as Code や Immutable Infrastructure。 あと最近だと Remote。

隔週ペースだったけど、今年からは毎週を目標にしているみたい。 自分が Podcast を聴くようになったのは、まさに Rebuild がきっかけ。 同じ人は多いと思う。

ゲストは naoya 氏の出演回数が多くて、もはやレギュラーと呼んで差し支えないレベル。 miyagawa 氏は COOKPAD 社に所属しているから、 そろそろ COOKPAD のエンジニアがこぞってゲスト出演しないかな、 なんてことをずっと思ってる。

アキバ系!電脳空間カウボーイズZ

f:id:griefworker:20140219195855j:plain

アキバ系とあるけど萌え系ではない。ガチでテクノロジー系の Podcast。 なんと現時点で 371 回もある。 聴いたのは iTunes Store で配信されている 358 回以降。

この Podcast の魅力は、業界の著名人をゲストに迎えてのトーク。 ドワンゴ会長の川上氏がゲストの回では、 ネットでも話題になった「新卒入社試験の受験料制度導入」の理由を聞いて納得。 特にリクルートは武器商人のくだりは面白かった。

あと Cerevo の回での enchantMOON の裏話。そこまでの苦労をしていたのか、と。 ハードウェアベンチャーは酒が強くないといけないのか、なんて。

UEI の清水氏はブログで自身について「口が上手い」と書いていたけど、聴いて納得だった。

職質テックトーク

f:id:griefworker:20140219200134j:plain

公開されているものの大半は、YAPC::Asia Tokyo 2013 スピーカーをゲストに招いたトークだったように思う。 話題は当然、YAPC で話す内容についてが主。

自分 Perl 使ってないけど、それだけに Perlフレームワークやツールの話は新鮮だった。 Podcast の良い所に、トークだと抽象度が高くなるので理解しやすい、ってのはあると思う。

moznion 氏がインターンで京都に行ったあたりからペースダウンして、最後の配信から2ヶ月経ってる。 Rebuild をやってる miyagawa 氏をゲストに迎えるのがゴール、みたいなことを最初の回で話していたので、そこまで辿りつけるのかひそかに注目している。

だんごゆっけの平和な話

f:id:griefworker:20140219200824j:plain

最近始まった、ゆーすけべー氏とだんご氏(?)のゆるい Podcast。 0回と1回を聴いたけど、テクノロジーの話題ほとんど無い。 味噌汁とか境界線の話が強く印象にのこった。 「富士山と地続きに繋がっているから自分も富士山の一部」とか哲学的だな、もう。

あと、「だしの入っていない味噌汁は味噌汁と呼べるのか?」に関しては、 自分は「ただのマズイ味噌汁」というのに1票。 最近はダシ入り味噌ってものがあって、それ使えば初心者にありがちな悲劇を回避できるらしい。 平和だね~。

Tech Podcast の情報募集中

ブログや雑誌の記事でのみ知っている、有名エンジニアのトークを聴くというのは、 思っていた以上に新鮮で刺激的だった。

東京に住んでいれば勉強会やカンファレンスで会う機会があるだろうけど、 地方在住貧乏エンジニアにとっては、その機会を作り出すことすら難しい。 Podcast は自分にとってもはや貴重な情報源。

あと Podcast は「ながら聴き」できるのがいい。 通勤・帰宅中に聴けるし、(環境が許すなら)仕事中の BGM 代わりにもできる。 次の配信が待ち遠しい。

依存ファイルの自動解決に失敗したときは motion-require

RubyMotion は Smart File Dependencies 機能があるので、依存ファイルを自動で解決してくれる。 でも、たま~に解決できなくて定数未定義エラーに遭遇するときがある。

そんなときは Rakefile で files_dependencies を記述すればいいんだけど、 依存しているファイルの指定は、できれば使っている箇所のすぐそばに書きたいよね。

そこで motion-require の出番。

インストールは Gemfile に

gem 'motion-require'

を書いて bundle install すればおk。

motion_require メソッドを使って、 Ruby の require みたいに、依存しているファイルを記述できるようになる。

motion_require "bases/base_list_view_controller"

class EntryListViewController < BaseListViewController
end

という風に依存ファイルを指定し、Rakefile

# -*- coding: utf-8 -*-
$:.unshift("/Library/RubyMotion/lib")
require 'motion/project/template.ios'

begin
  require 'bundler'
  Bundler.require
rescue LoadError
end

# これを追加
Motion::Require.all

Motion::Project::App.setup do |app|
  # ...
end

と書いておけば、ビルド時に motion_require をもとに依存関係をかき集め、 プロジェクトに設定してくれる。

ソースコードを読めば分かるけど、motion_require はただのマークであって、 実際にファイルを読み込んだりはしない。

通常は RubyMotion の Smart File Dependencies にまかせておいて、 失敗する箇所にだけ motion_require を使うのがお勧めかな。

ADBannerView の delegate を Storyboard で設定しない方がいい?

審査でリジェクトを受けて発覚したんだけど、

  1. Storyboard で ViewController に ADBannerView を配置
  2. Storyboard で ViewController を ADBannerView の delegate に設定
  3. ViewController に ADBannerViewDelegate のメソッドを実装
    • ADBannerViewDelegate のメソッド内で self.view にアクセスするコードを記述

このとき iPad (iOS7) のシミュレーターでアプリを実行すると、 self.view にアクセスする箇所で EXC_BAD_ACCESS エラーが発生していた。 self.view は nil

iPhone のシミュレーターと、実機の iPhone5 では発生しなかった。 iPadiPhone では呼ばれるタイミングが違うんだろうか?

Storyboard で delegate を設定するのをやめて、viewDidLoad で設定することで回避はできたけど…。 とりあえずメモしておく。

AutoLayout を使って ADBannerView を配置する方法

ADBannerView は広告取得に失敗したら隠さないと、レビューでリジェクトされてしまう。

今までは広告取得に失敗したら frame を操作して画面外に移動していた。そのためのモジュールを Objective-C で書いたりもした。でも最近は AutoLayout を使うようにしている。

RubyMotion のサンプルは次の通り。

class AppDelegate
  def application(application, didFinishLaunchingWithOptions:launchOptions)
    @window = UIWindow.alloc.initWithFrame(UIScreen.mainScreen.bounds)
    @window.rootViewController = MainViewController.controllerWithNavigation
    @window.makeKeyAndVisible
    true
  end
end

class MainViewController < UIViewController
  CELL_ID = "Cell"

  def self.controllerWithNavigation
    UINavigationController.alloc.initWithRootViewController(
      self.alloc.initWithNibName(nil, bundle:nil)
    )
  end

  def viewDidLoad
    super
    self.title = "MotionLaoutSample"

    @tableView = UITableView.alloc.initWithFrame(
      CGRectZero,
      style:UITableViewStylePlain
    ).tap do |table|
      table.delegate = table.dataSource = self
      self.view.addSubview(table)
    end

    @bannerView = ADBannerView.alloc.initWithFrame(CGRectZero).tap do |banner|
      banner.delegate = self
      banner.hidden = true
      self.view.addSubview(banner)
    end

    # motion-layout をつかってレイアウト
    Motion::Layout.new do |layout|
      layout.view self.view
      layout.subviews "table" => @tableView, "banner" => @bannerView
      layout.vertical "|-0-[table]-0-[banner]-0-|"
      layout.horizontal "|-0-[table]-0-|"
      layout.horizontal "|-0-[banner]-0-|"
    end

    # ADBannerView の高さを動的に変更したいので
    # 制約をメンバに保持しておく
    @bannerHeight = NSLayoutConstraint.constraintWithItem(
      @bannerView,
      attribute: NSLayoutAttributeHeight,
      relatedBy: NSLayoutRelationEqual,
      toItem: nil,
      attribute: NSLayoutAttributeHeight,
      multiplier: 1,
      constant: 0 
    )
    @bannerView.addConstraint(@bannerHeight)
  end

  def tableView(tableView, numberOfRowsInSection:section)
    20
  end

  def tableView(tableView, cellForRowAtIndexPath:indexPath)
    cell = tableView.dequeueReusableCellWithIdentifier(CELL_ID)
    unless cell
      cell = UITableViewCell.alloc.initWithStyle(
        UITableViewCellStyleDefault,
        reuseIdentifier: CELL_ID
      )
    end
    cell.textLabel.text = "Row#{indexPath.row}"
    cell
  end

  def bannerView(banner, didFailToReceiveAdWithError:error)
    # 広告の取得に失敗したら banner を隠す
    banner.hidden = true
    @bannerHeight.constant = 0
    self.view.layoutIfNeeded
  end

  def bannerViewDidLoadAd(banner)
    # 広告の取得に成功したら banner を表示する
    @bannerHeight.constant = 50
    banner.hidden = false
    self.view.layoutIfNeeded
  end
end

RubyMotion での AutoLayout には motion-layout が便利。ADBannerView の高さの制約を動的に変更したかったので、そこだけは NSLayoutConstraint を直接使っている。

frame を変更する方法の場合、ADBannerView と UITableView 両方変更しないといけなかった。AutoLayout なら高さの制約を変更するだけで、あとはよしなにやってくれる。 AutoLayout ホント便利。

強いチームはオフィスを捨てる

つい先日 Basecamp に社名を変えた、旧 37signals の本『Remote』の日本語翻訳版。 「こんな意識高いタイトルじゃなくて、Remote のままでいいのに」って思った人は自分以外にもいるはず。

37signals は本社こそシカゴにあるけど、Rails 作者の DHH がデンマークに住んでいたのは有名な話。 現在でも、社員36人中、本社で働いているのは13人。残りの社員はリモートで働いている。 本書は、リモートワークを実践している企業による、机上の空論ではない実践本。 彼らの経験が凝縮された一冊。

確かに、片道1時間近くかけてオフィスに通勤しても、 ミーティングや電話によってよく作業が中断されてしまうとしたら、 オフィスでやる作業はお世辞にも生産性が高いとはいえない。 通勤時間なんて無駄以外の何者でもない。

じゃあ、リモートワークを導入するだけで、オフィスや通勤から開放されて、生産性が高まり万事上手くいくかと言えば、そんなことはないわけで。 上司の反対、社員同士のコミュニケーション、仕事外の誘惑、反対に働きすぎてしまう、etc。

本書ではそれらの、リモートワークのデメリットに対して、具体的な対策方法を紹介している。 何度か出てくる、リモートワークのメリットを述べても認めないような上司や会社なら転職しちゃえ、 というのはいささかマッチョ過ぎる気がするけど。

リモートワークを実践したいけど、今の職場でやれるかといったら、難しいだろうな。 この人に辞められたら会社がヤバイっていう、スペシャルな存在でもない限り。 ボトムアップよりもトップダウンの方が可能性がある。 自分が独立して起業することがあれば、リモートワークを取り入れたいとは思う。

強いチームはオフィスを捨てる: 37シグナルズが考える「働き方革命」

強いチームはオフィスを捨てる: 37シグナルズが考える「働き方革命」

JEAN-PAUL HEVIN

週末、天神の岩田屋本館地下 2F にある JEAN-PAUL HEVIN で、 優雅なティータイムと洒落込んできた。

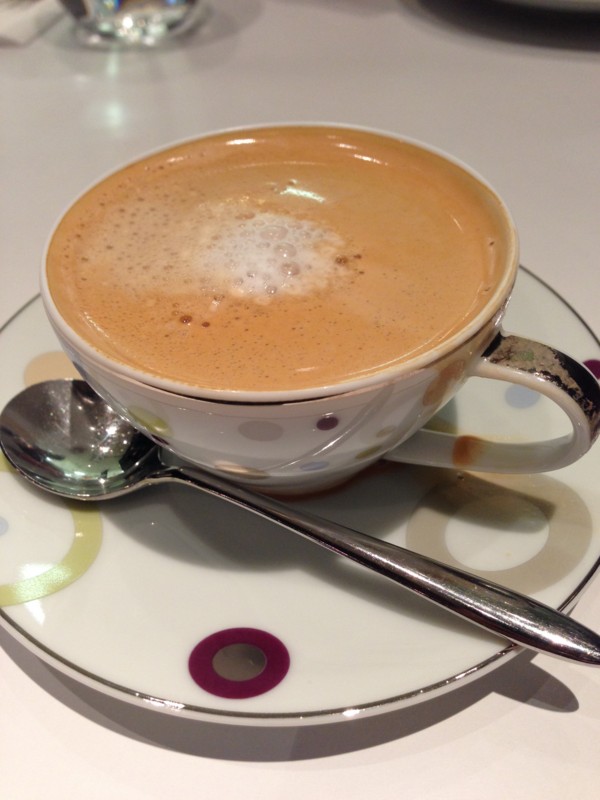
飲んだのはエスプレッソだけど。

f:id:griefworker:20140208141047j:plain

『カフェ ノワゼット』(735円) はフランス風エスプレッソに少量のミルクが入ったもの。 音の響きに引かれた。砂糖は入っていないので苦めだけど、ミルクが入っている分飲みやすい。

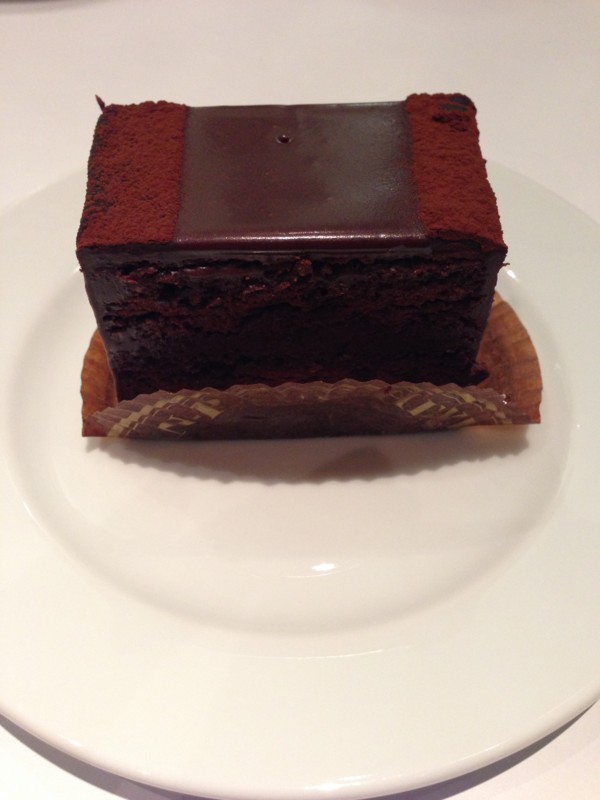
あとケーキも注文。

f:id:griefworker:20140208141040j:plain

定番商品の『グアヤキル』(590円)。 超濃厚なチョコレートケーキ。 チョコレートスのビターな風味が口いっぱいに広がって、 エスプレッソを飲んでも消えたりしない。 流石チョコレートが本職なだけある。 洋菓子店のものとは次元が違う。 もはや別のジャンルの食べ物だな。

関連ランキング:チョコレート | 西鉄福岡駅(天神)天神駅天神南駅

Teacup の AutoLayout サポートを使ってカスタム UITableViewCell をレイアウトする

RubyMotion 用 gem の Teacup は、CSS っぽくビューのデザインを記述できる、 厳密にはビューのプロパティを設定するための内部 DSL。 なんと AutoLayout もサポートしていたりする。

Teacup の AutoLayout を使って、カスタム UITableViewCell をレイアウトしようとして、 README に書かれていないことで結構苦労したのでメモしておく。

まずスタイルを記述する。

Teacup::Stylesheet.new :item_cell do
  style :title_label,
    constraints: [
      constrain(:left).equals(:superview, :left),
      constrain(:top).equals(:superview, :top),
      constrain(:bottom).equals(:superview, :bottom),
    ]

  style :price_label,
    constraints: [
      constrain(:right).equals(:superview, :right),
      constrain(:top).equals(:superview, :top),
      constrain(:bottom).equals(:superview, :bottom),
    ]

  style :comment_label,
    constraints: [
      constrain(:left).equals(:title_label, :right),
      constrain(:right).equals(:price_label, :left),
      constrain(:top).equals(:superview, :top),
      constrain(:bottom).equals(:superview, :bottom),
    ]
end

constraints の部分が AutoLayout。ここ記述ミスしやすい上に、ミスっていてもなかなか気づかない。今回は1時間ほどハマった。要注意。

次にスタイルを適用するセルを作る。 UIViewController は Teacup が拡張していて stylesheet メソッドが使えるけど、 UIView は拡張されていない。 Teacup::Layout を incude する必要がある。

class ItemCell < UITableViewCell
  CELL_ID = "item-cell"

  include Teacup::Layout
  stylesheet :item_cell

  def self.cellForItem(item, inTableView:tableView)
    cell = tableView.dequeueReusableCellWithIdentifier(CELL_ID)
    unless cell
      cell = self.alloc.initWithStyle(
        UITableViewCellStyleDefault,
        reuseIdentifier:CELL_ID
      )
    end
    cell.setupItem(item)
    cell
  end

  def initWithStyle(style, reuseIdentifier:reuseIdentifier)
    super
    layout self.contentView do
      @titleLabel = subview(UILabel, :title_label)
      @commentLabel = subview(UILabel, :comment_label)
      @priceLabel = subview(UILabel, :price_label)
    end
    self
  end

  def setupItem(item)
    @titleLabel.text = item[:title]
    @commentLabel.text = item[:comment]
    @priceLabel.text = "#{item[:price]}"
  end
end

セルを使うコントローラー。

class MainViewController < UITableViewController
  def self.controllerWithNavigation
    UINavigationController.alloc.initWithRootViewController(self.alloc.init)
  end

  def init
    initWithStyle(UITableViewStylePlain)
    @items = [
      { title: "foo", comment: "aaaaa", price: 100 },
      { title: "bar", comment: "bbbbb", price: 200 },
      { title: "hoge", comment: "ccccc", price: 300 },
      { title: "fuga", comment: "eeeee", price: 400 },
    ]
    self
  end

  def viewDidLoad
    super
    self.title = "Sample"
  end

  def tableView(tableView, numberOfRowsInSection:section)
    @items.size
  end

  def tableView(tableView, cellForRowAtIndexPath:indexPath)
    item = @items[indexPath.row]
    cell = ItemCell.cellForItem(item, inTableView:tableView)

    # AutoLayout 適用
    cell.restyle!
    cell.apply_constraints

    cell
  end
end

cell の restyle! と apply_constrains を呼び出さないと、スタイルに記述した制約が適用されない。 README に書いてなくて、これまたハマった。最終的にはソースコードまで読むことに。

最後に、今回作成したサンプルを載せておく。

# coding: utf-8

Teacup::Stylesheet.new :item_cell do
  style :title_label,
    constraints: [
      constrain(:left).equals(:superview, :left),
      constrain(:top).equals(:superview, :top),
      constrain(:bottom).equals(:superview, :bottom),
    ]

  style :price_label,
    constraints: [
      constrain(:right).equals(:superview, :right),
      constrain(:top).equals(:superview, :top),
      constrain(:bottom).equals(:superview, :bottom),
    ]

  style :comment_label,
    constraints: [
      constrain(:left).equals(:title_label, :right),
      constrain(:right).equals(:price_label, :left),
      constrain(:top).equals(:superview, :top),
      constrain(:bottom).equals(:superview, :bottom),
    ]
end

class MainViewController < UITableViewController
  def self.controllerWithNavigation
    UINavigationController.alloc.initWithRootViewController(self.alloc.init)
  end

  def init
    initWithStyle(UITableViewStylePlain)
    @items = [
      { title: "foo", comment: "aaaaa", price: 100 },
      { title: "bar", comment: "bbbbb", price: 200 },
      { title: "hoge", comment: "ccccc", price: 300 },
      { title: "fuga", comment: "eeeee", price: 400 },
    ]
    self
  end

  def viewDidLoad
    super
    self.title = "Sample"
  end

  def tableView(tableView, numberOfRowsInSection:section)
    @items.size
  end

  def tableView(tableView, cellForRowAtIndexPath:indexPath)
    item = @items[indexPath.row]
    cell = ItemCell.cellForItem(item, inTableView:tableView)

    # AutoLayout 適用
    cell.restyle!
    cell.apply_constraints

    cell
  end
end

class ItemCell < UITableViewCell
  CELL_ID = "item-cell"

  include Teacup::Layout
  stylesheet :item_cell

  def self.cellForItem(item, inTableView:tableView)
    cell = tableView.dequeueReusableCellWithIdentifier(CELL_ID)
    unless cell
      cell = self.alloc.initWithStyle(
        UITableViewCellStyleDefault,
        reuseIdentifier:CELL_ID
      )
    end
    cell.setupItem(item)
    cell
  end

  def initWithStyle(style, reuseIdentifier:reuseIdentifier)
    super
    layout self.contentView do
      @titleLabel = subview(UILabel, :title_label)
      @commentLabel = subview(UILabel, :comment_label)
      @priceLabel = subview(UILabel, :price_label)
    end
    self
  end

  def setupItem(item)
    @titleLabel.text = item[:title]
    @commentLabel.text = item[:comment]
    @priceLabel.text = "#{item[:price]}"
  end
end

class AppDelegate
  def application(application, didFinishLaunchingWithOptions:launchOptions)
    @window = UIWindow.alloc.initWithFrame(UIScreen.mainScreen.bounds)
    @window.rootViewController = MainViewController.controllerWithNavigation
    @window.makeKeyAndVisible
    true
  end
end