はじめに
前回、Messenger パターンという、ViewModel から View に要求を送る方法を試しました。
ただ、「View のコードビハインドにメッセージを処理するコードなんて書きたくない!」っていう人は結構いるみたいです。私もできることならコードビハインド書きたくないですね。
そんな人向けに、「Blend SDK に含まれている System.Windows.Interactivity.dll を使って、メッセージに対する処理を XAML で書いてしまおう」という、 Messenger を発展させたパターンがありました。その名も「Messenger + Behavior パターン」。
Messenger + Behavior パターンの鍵
System.Windows.Interactive.dll で提供されている Interaction クラスが重要。こいつは DependencyObject の派生クラスにトリガーやビヘイビアを設定するための添付プロパティを提供しています。
簡単に言うと、Interaction クラスを使って、メッセージに対する処理(振る舞い)を、View に添付プロパティとして設定しちゃおう、ってことです。
Messenger + Behavior パターンを実装してみます
今回も MVVM Light Toolkit を使います。ダウンロードはこちら。
Blend SDK はここからダウンロードできます。Expression Blend 買わなくてもできるよ!
MVVM Light Toolkit には System.Windows.Interactive.dll が同梱されているので、それを使ってもいいです。
まず Messenger に反応するトリガーを実装します
ViewModel が送信した DialogMessage に反応して、何かアクションを実行するトリガーです。
using System.Windows;
using System.Windows.Interactivity;
using GalaSoft.MvvmLight.Messaging;

namespace MvvmLightSample
{
    // Messenger が DialogMessage を受信したときに反応するトリガー。
    public class DialogMessageTrigger : TriggerBase<DependencyObject>
    {
        protected override void OnAttached()
        {
            base.OnAttached();

            // DialogMessage を受信したらアクションを実行
            // AssociatedObject は添付プロパティでこのトリガーを設定したオブジェクト。
            Messenger.Default.Register<DialogMessage>(
                AssociatedObject,
                msg => InvokeActions(msg));
        }

        protected override void OnDetaching()
        {
            Messenger.Default.Unregister<DialogMessage>(AssociatedObject);

            base.OnDetaching();
        }
    }
}
MessageBox を表示するアクションを実装します
DialogMessage を受け取って、MessageBox を表示するアクションです。先ほど作成した DialogMessageTrigger と組み合わせて使います。
using System.Windows;
using System.Windows.Interactivity;
using GalaSoft.MvvmLight.Messaging;

namespace MvvmLightSample
{
    // MessageBox を表示するアクション
    public class ShowMessageBoxAction : TriggerAction<DependencyObject>
    {
        protected override void Invoke(object parameter)
        {
            // DialogMessage を渡されたら
            // MessageBox を表示する
            var msg = parameter as DialogMessage;
            if (msg != null)
            {
                var result = MessageBox.Show(
                    msg.Content,
                    msg.Caption,
                    msg.Button,
                    msg.Icon,
                    msg.DefaultResult,
                    msg.Options);
                msg.Callback(result);
            }
        }
    }
}
View を実装します
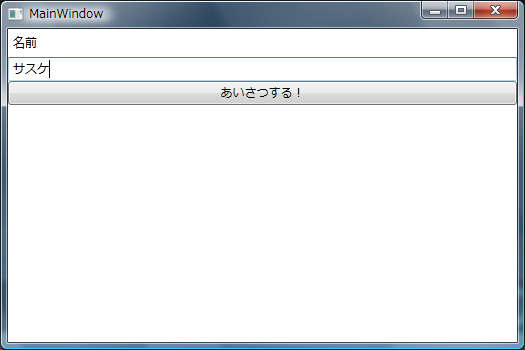
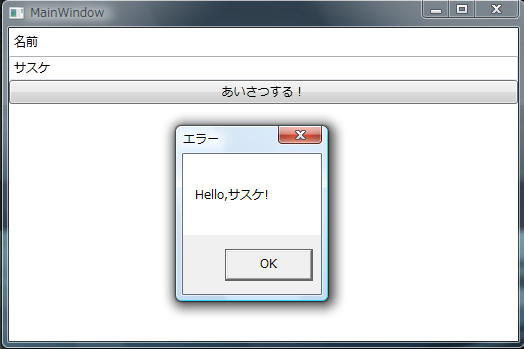
作成したトリガーとアクションを、Interaction クラスを使って View に設定します。これで ViewModel から DialogMessage を送信されると、この View が MessageBox を表示するようになりました。
<Window x:Class="MvvmLightSample.MainWindow"
        xmlns="http://schemas.microsoft.com/winfx/2006/xaml/presentation"
        xmlns:x="http://schemas.microsoft.com/winfx/2006/xaml"
        xmlns:i="clr-namespace:System.Windows.Interactivity;assembly=System.Windows.Interactivity"
        xmlns:l="clr-namespace:MvvmLightSample"
        Title="MainWindow" Height="350" Width="525"
        DataContext="{StaticResource MainViewModel}">

    <!--ViewModel が送った DialogMessage を受信したら MessageBox を表示-->
    <i:Interaction.Triggers>
        <l:DialogMessageTrigger>
            <l:ShowMessageBoxAction/>
        </l:DialogMessageTrigger>
    </i:Interaction.Triggers>

    <StackPanel>
        <Label Content="名前"/>
        <TextBox Text="{Binding Path=Name, UpdateSourceTrigger=PropertyChanged}"/>
        <Button Content="あいさつする!"
                Command="{Binding Path=GreetCommand}"/>
    </StackPanel>
</Window>
あと、コードビハインドには何も書いていません。
ViewModel は前回のものをそのまま流用
MVVM Light Toolkit が提供している Messenger パターンの実装を利用して、ViewModel から View にダイアログの表示をリクエストしています。
using System.Windows.Input;
using GalaSoft.MvvmLight;
using GalaSoft.MvvmLight.Command;
using GalaSoft.MvvmLight.Messaging;

namespace MvvmLightSample
{
    public class MainViewModel : ViewModelBase
    {
        public MainViewModel()
            : base(Messenger.Default)
        {
        }

        private string _name;

        // 名前。
        public string Name
        {
            get { return _name; }
            set
            {
                if (_name != value)
                {
                    _name = value;
                    RaisePropertyChanged("Name");
                }
            }
        }

        private ICommand _greetCommand;

        // 挨拶コマンド。
        public ICommand GreetCommand
        {
            get
            {
                return _greetCommand ??
                    (_greetCommand = new RelayCommand(GreetCommandExecute, CanGreetCommandExecute));
            }
        }

        // 挨拶コマンドの実行。
        private void GreetCommandExecute()
        {
            string greet = string.Format("Hello,{0}!", Name);
            MessengerInstance.Send(new DialogMessage(this, greet, result =>
            {
                // MessageBos を表示した後の処理をここに書く
                Name = string.Empty;
            }));
        }

        // 挨拶コマンドを実行できるか判定。
        private bool CanGreetCommandExecute()
        {
            return !string.IsNullOrEmpty(Name);
        }
    }
}
App も前回のをそのまま流用
ViewModel のインスタンスを App のリソースとして持たせています。
<Application x:Class="MvvmLightSample.App"
             xmlns="http://schemas.microsoft.com/winfx/2006/xaml/presentation"
             xmlns:x="http://schemas.microsoft.com/winfx/2006/xaml"
             xmlns:local="clr-namespace:MvvmLightSample"
             StartupUri="MainWindow.xaml">
    <Application.Resources>
        <local:MainViewModel x:Key="MainViewModel"/>
    </Application.Resources>
</Application>


